Moebius Shaders in Unity - Part 1
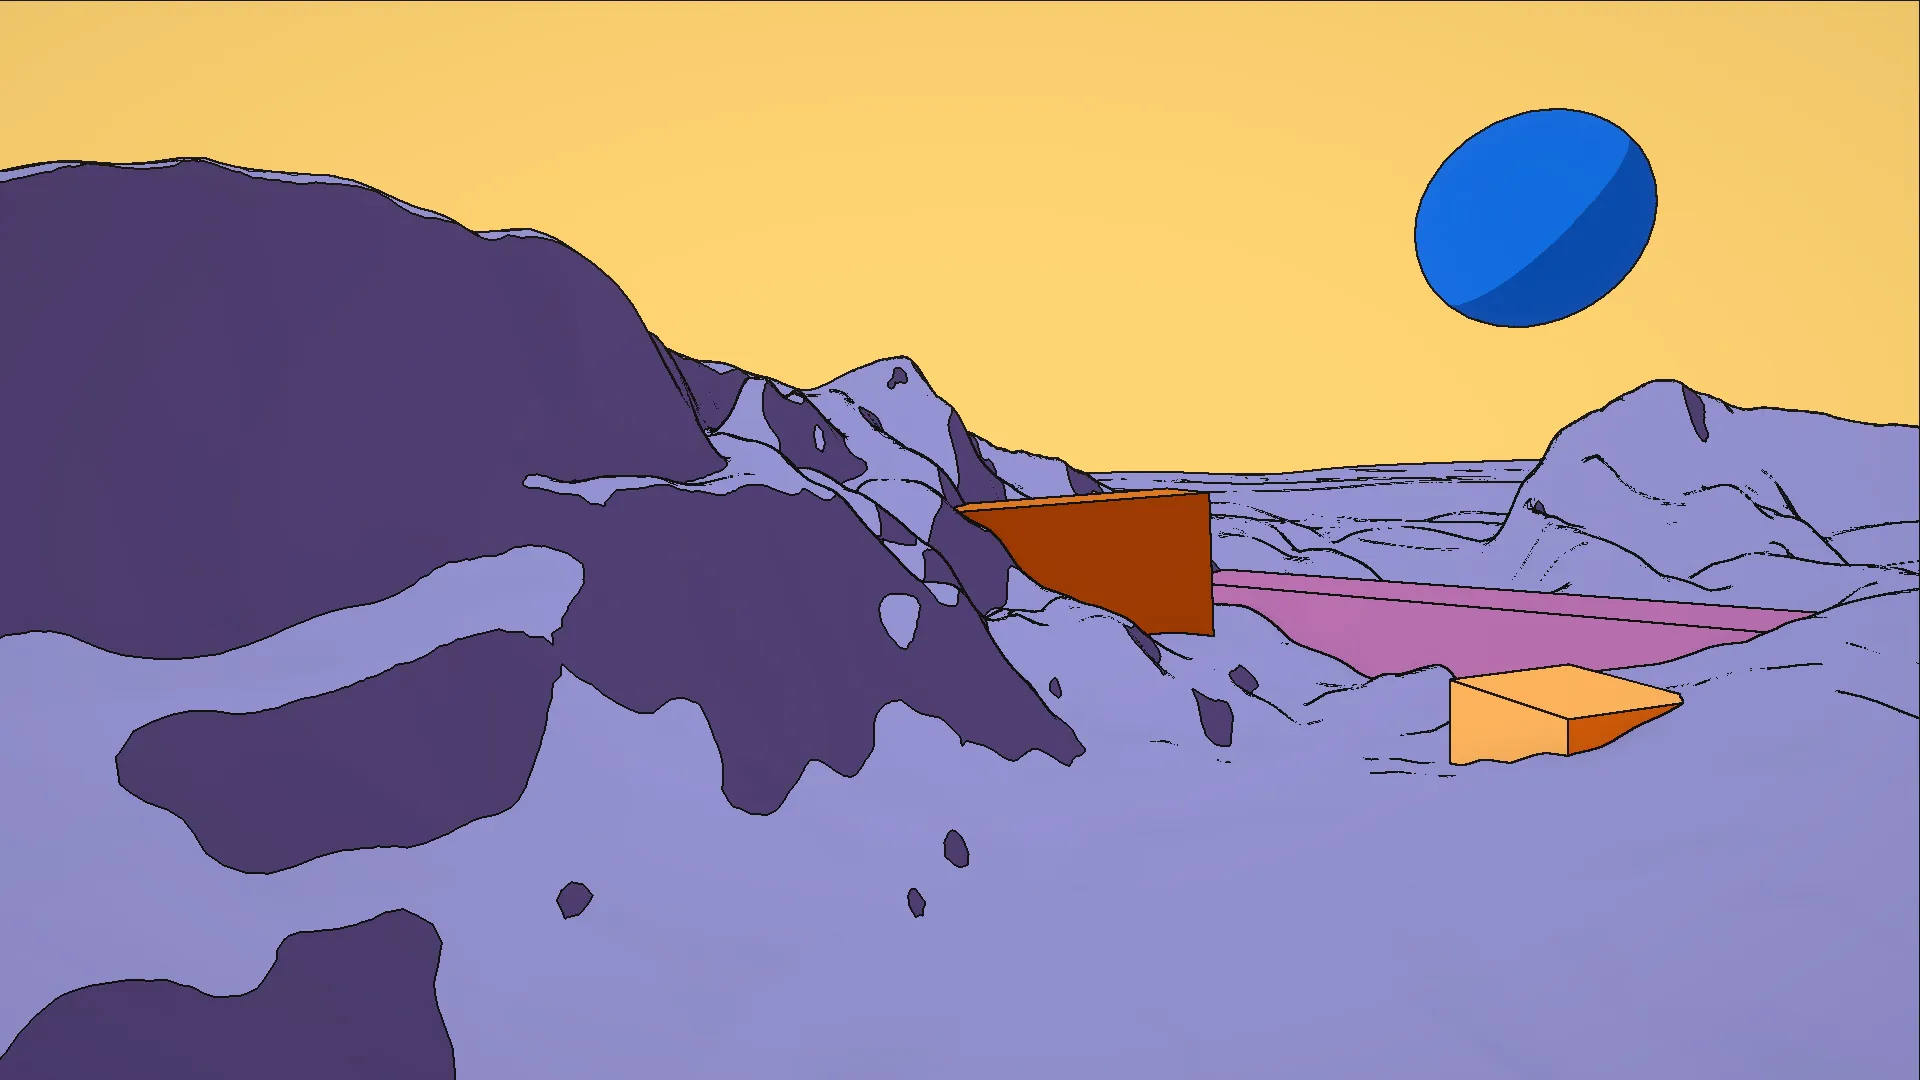
Inspirations and goals
Jean Giraud worked in science fiction, fantasy, and western comics under the name Moebius. His graphic style was specific enough that other artists named him directly: Otomo cited him as a reference for Akira, and his concept work shaped the aesthetics of Alien, Tron, and The Fifth Element. His wife said his exceptional precision came from his severe myopia.

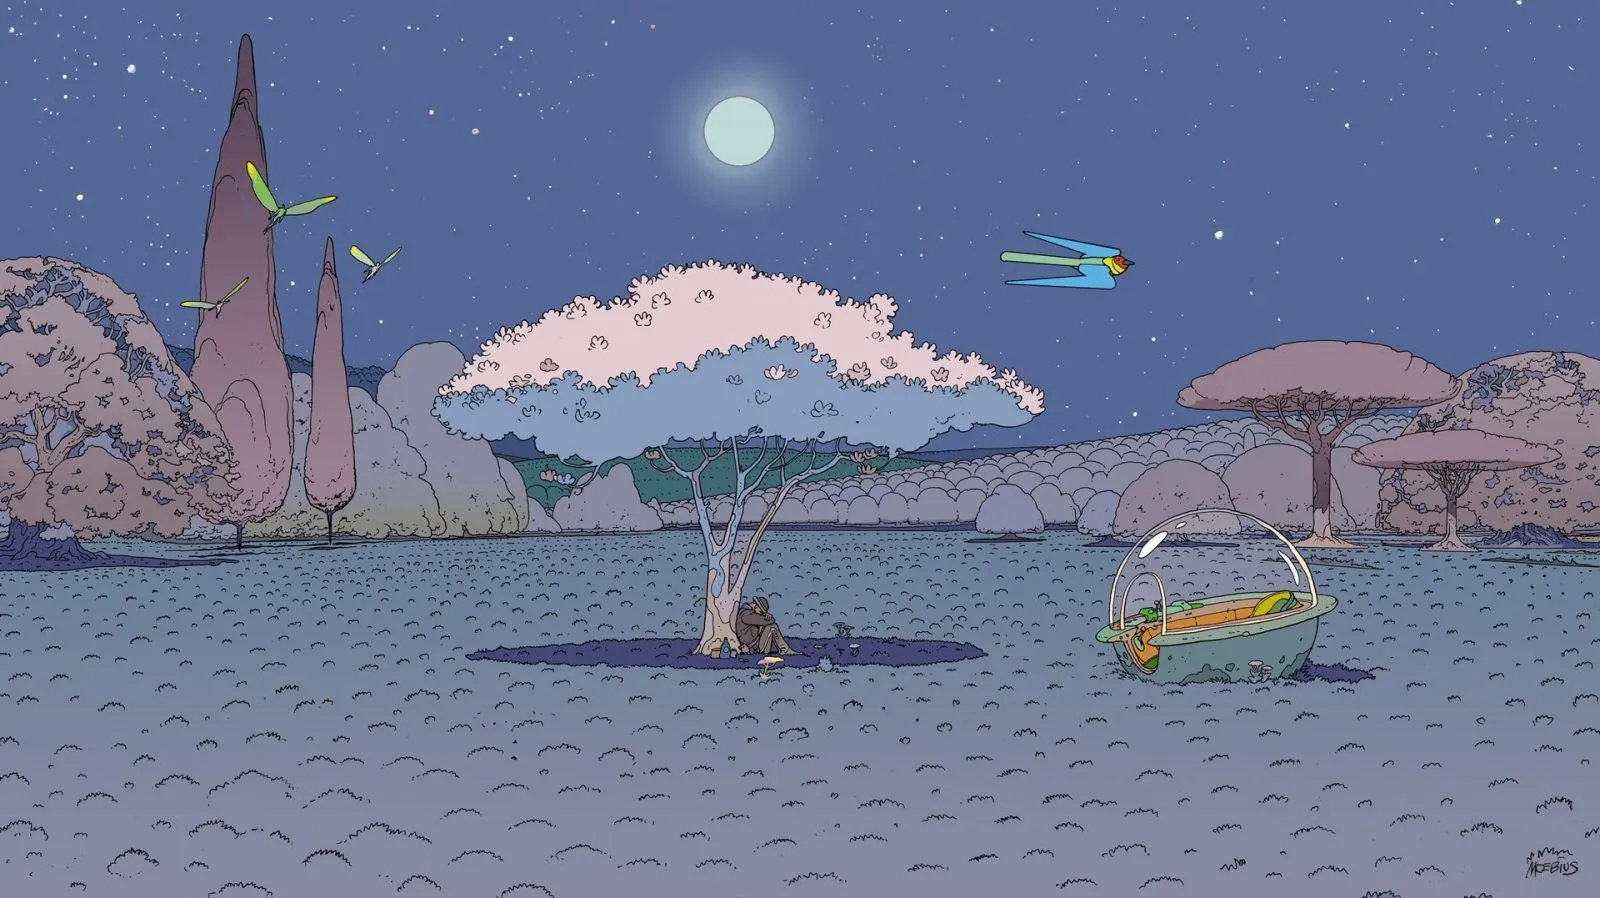
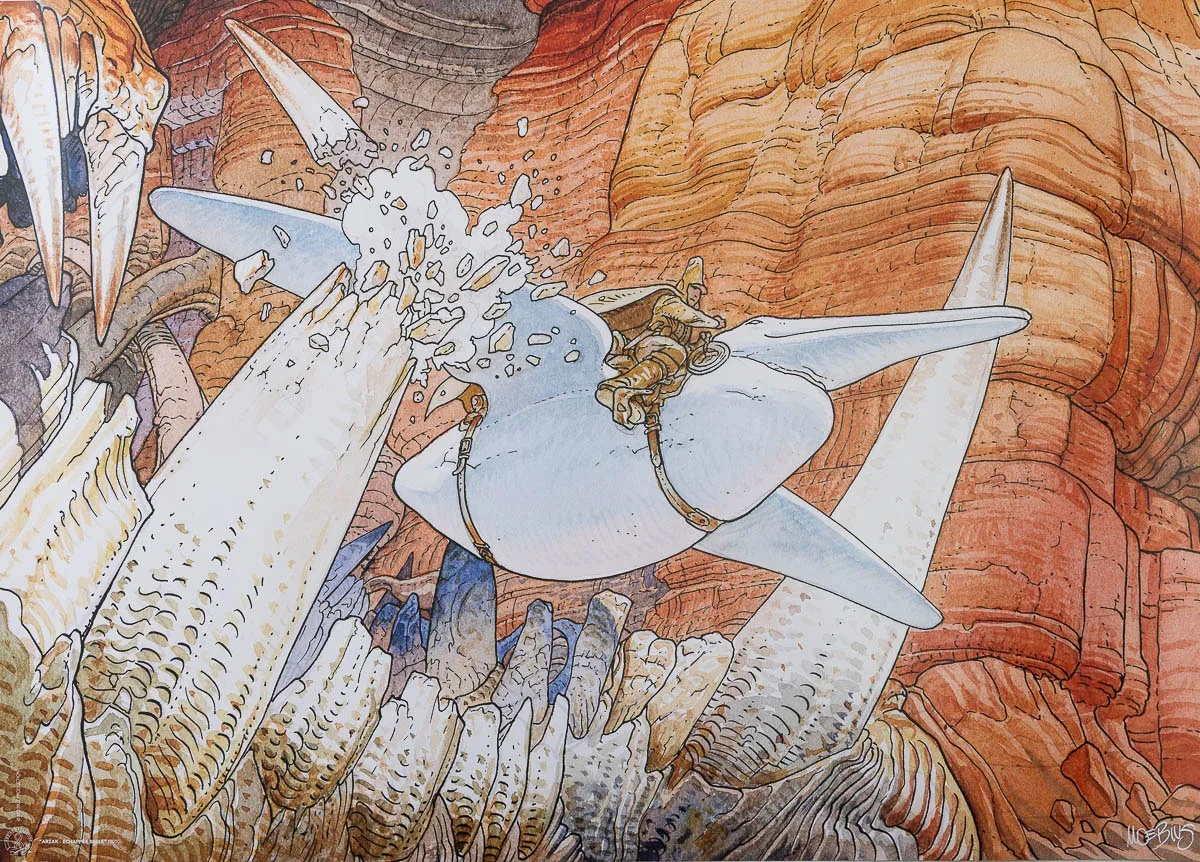
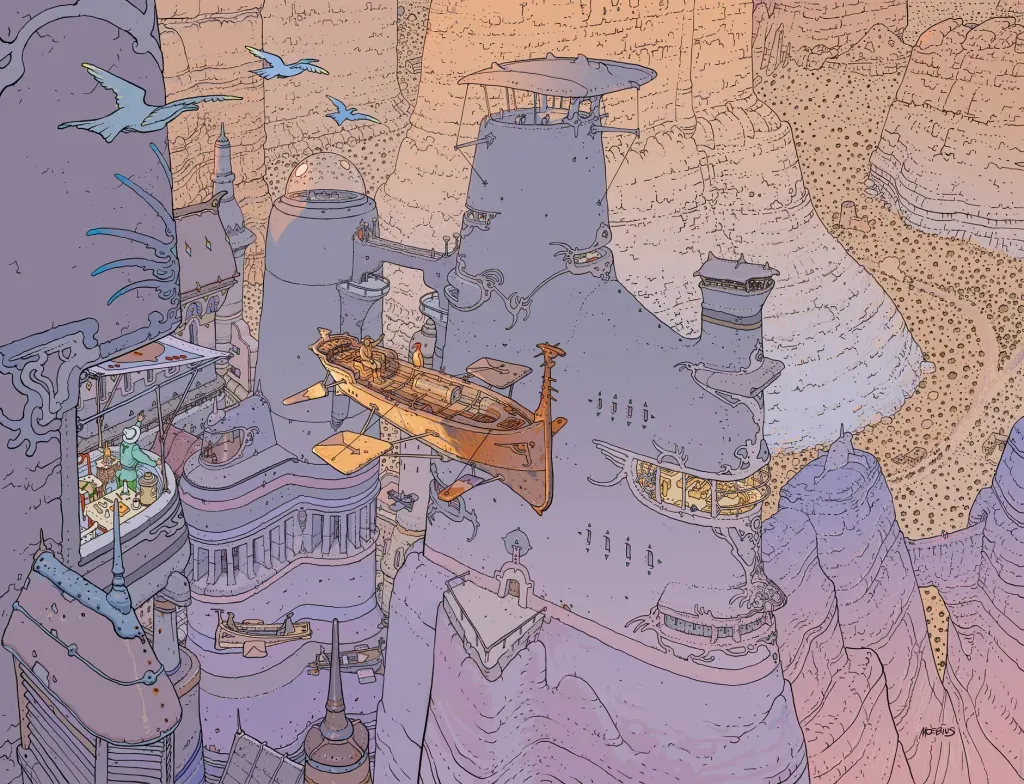
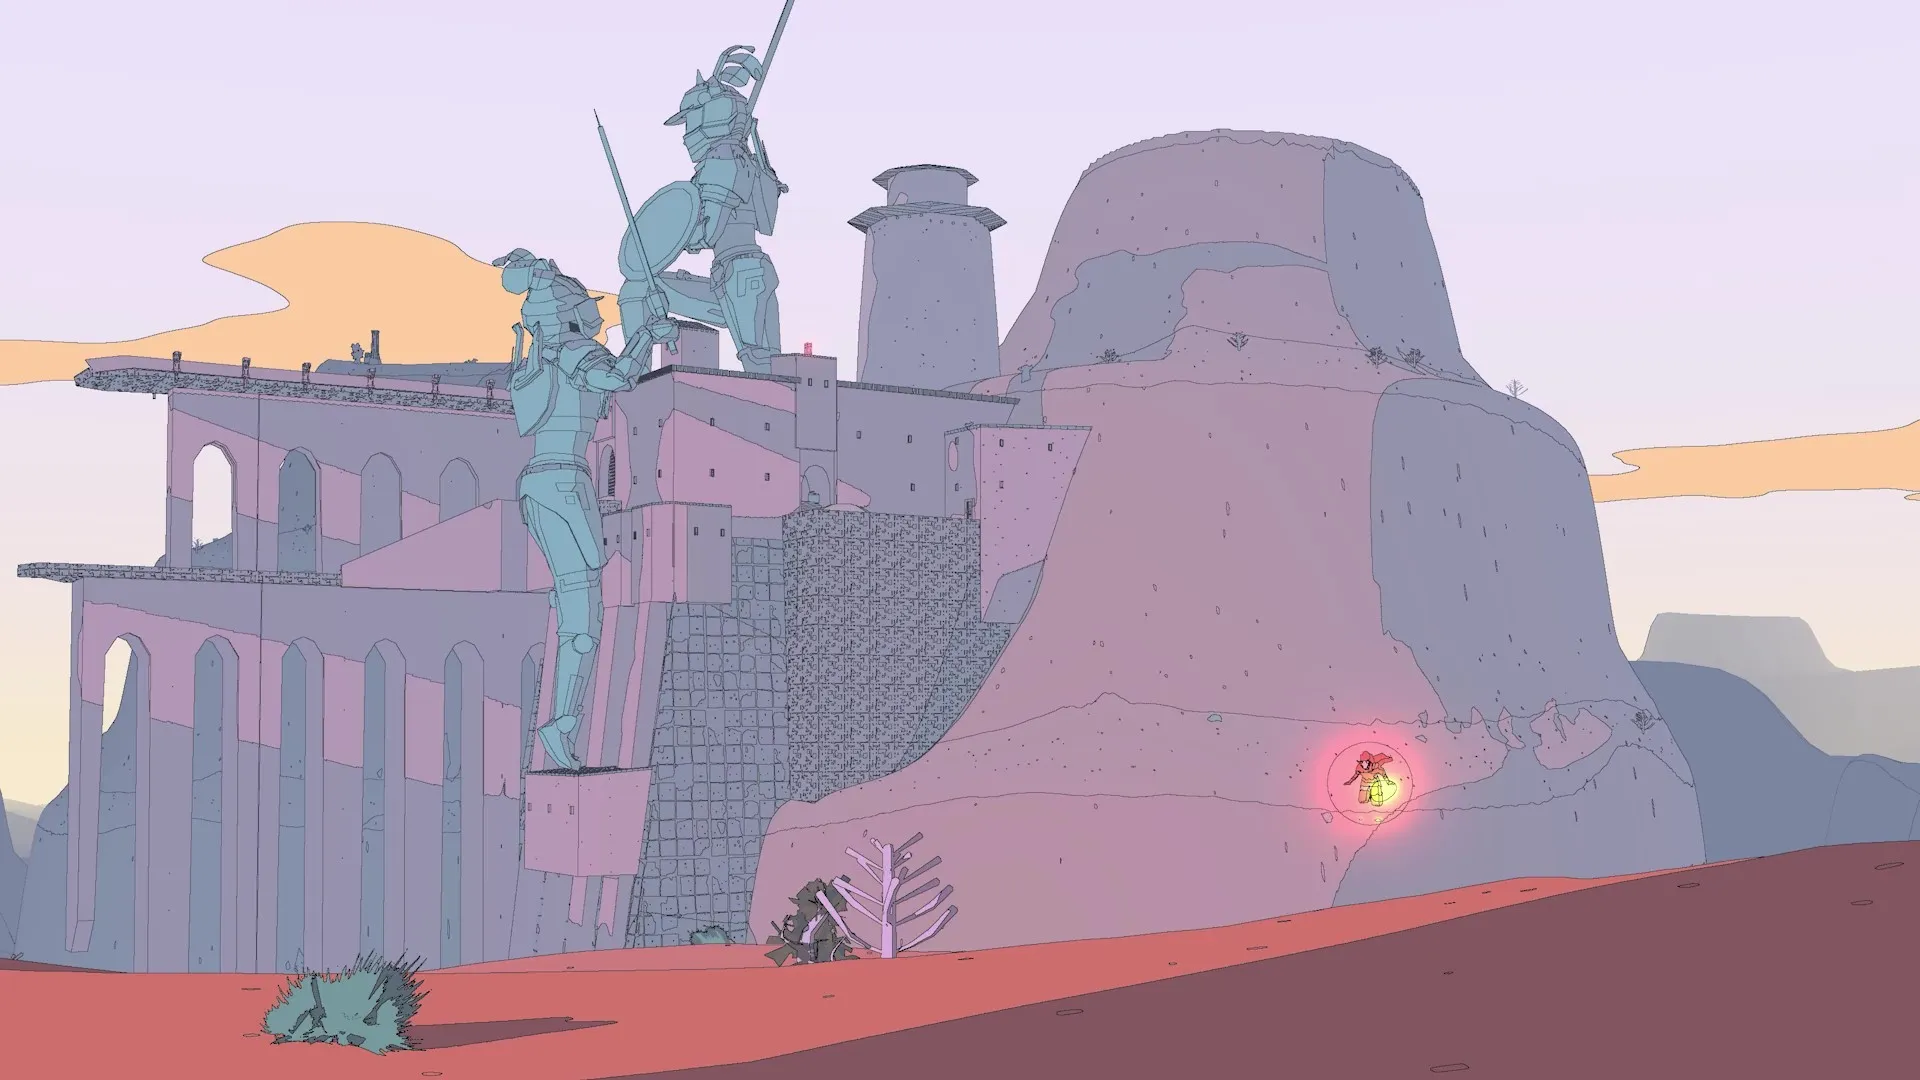
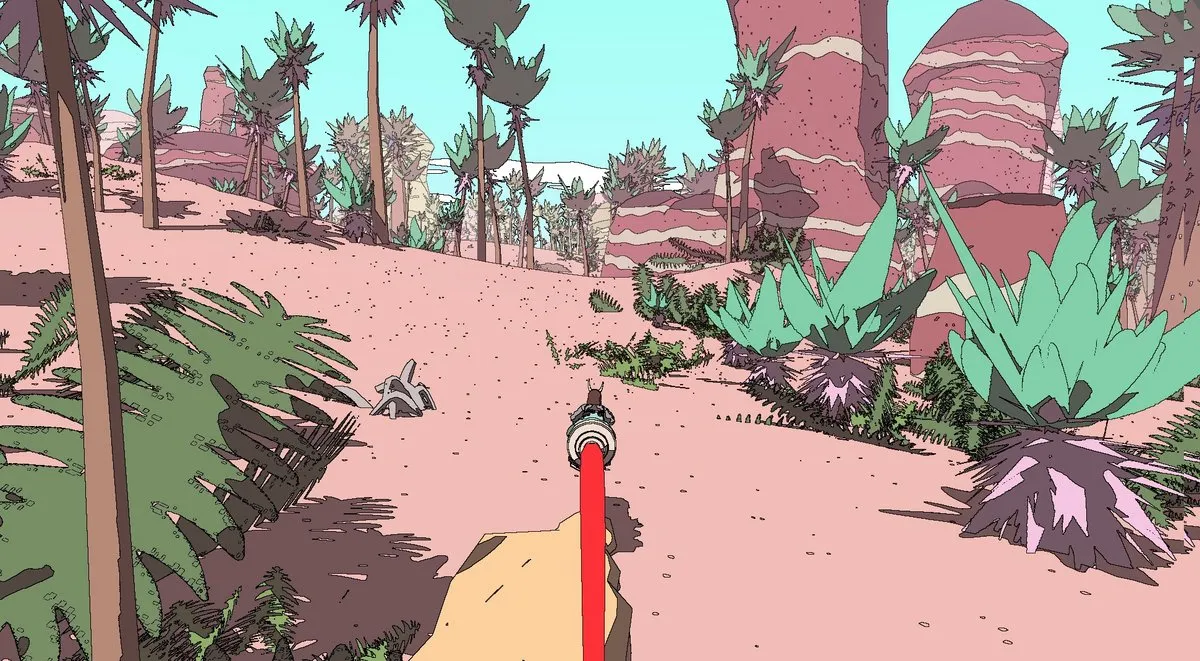
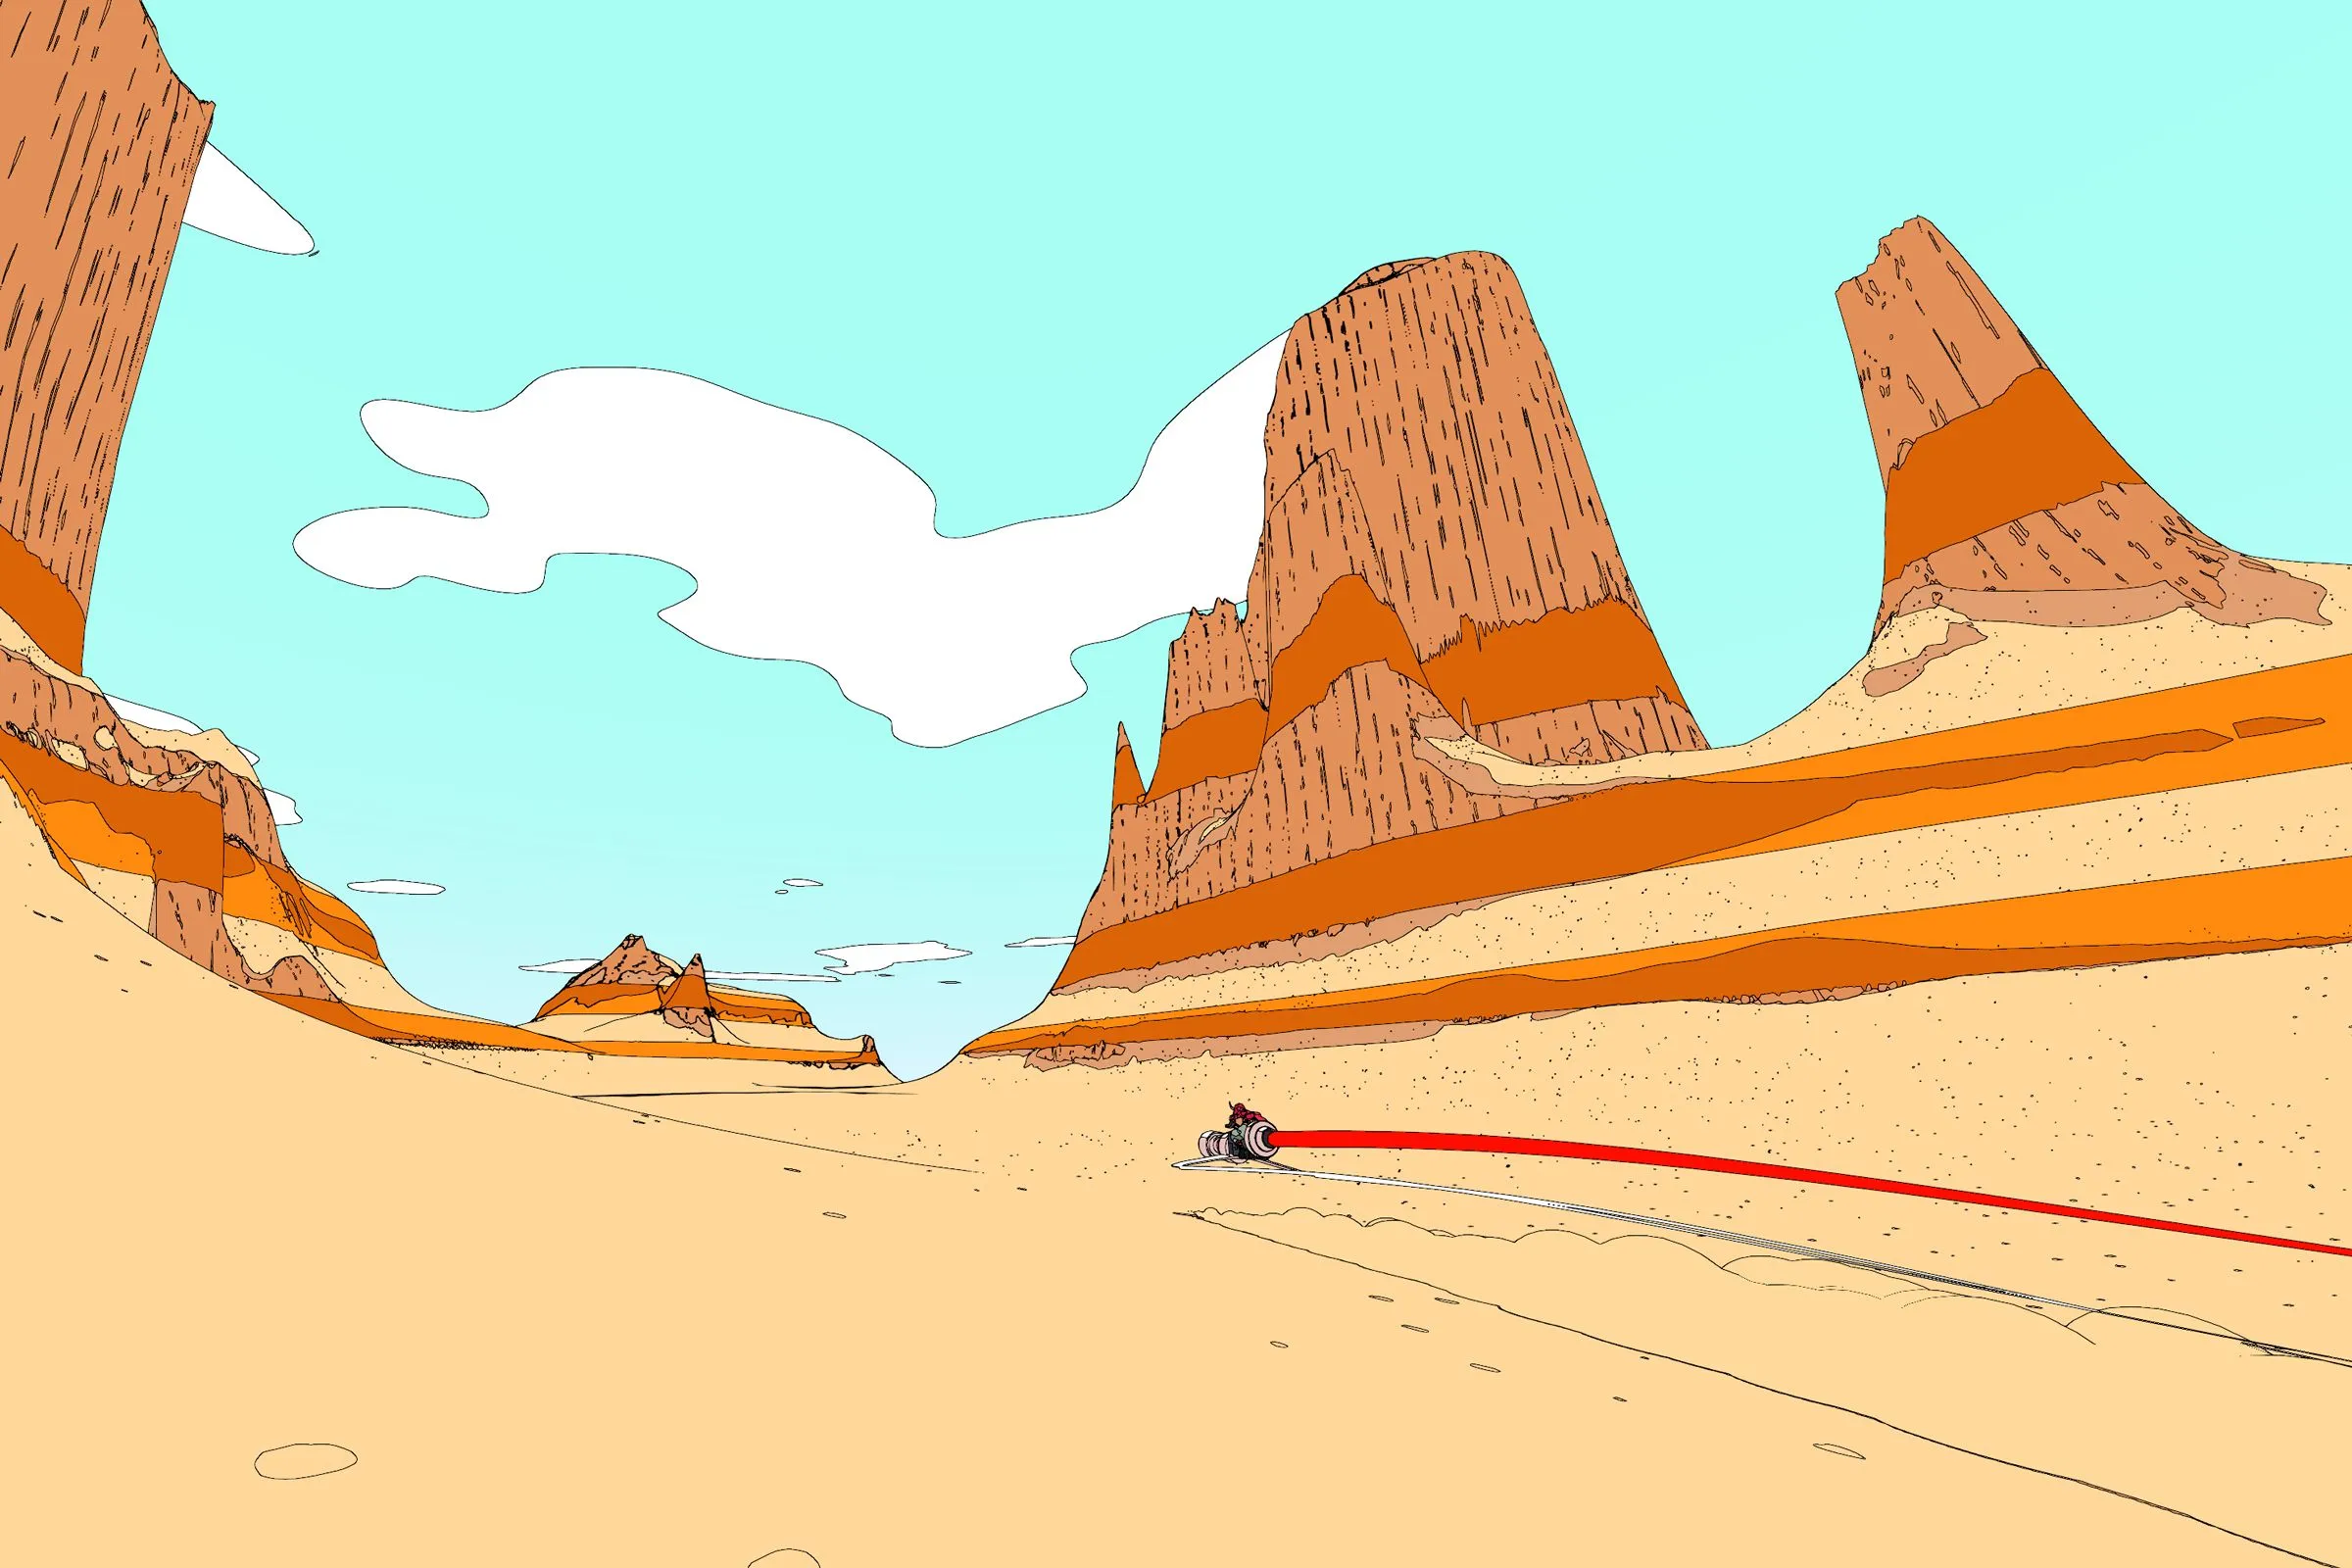
In France he’s something of a monument, which probably explains why I was slow to come to his work. The kind of classic you’re expected to worship tends to make you resistant (at least it was for me..). What actually got me there was searching for desert landscape references while drawing: I discovered Arzak, with those wordless panoramas of alien plateaux, and the pages did the rest. I came back to his work again when Sable came out in 2021, a game by Shedworks that used his iconic graphic style as a direct visual reference.
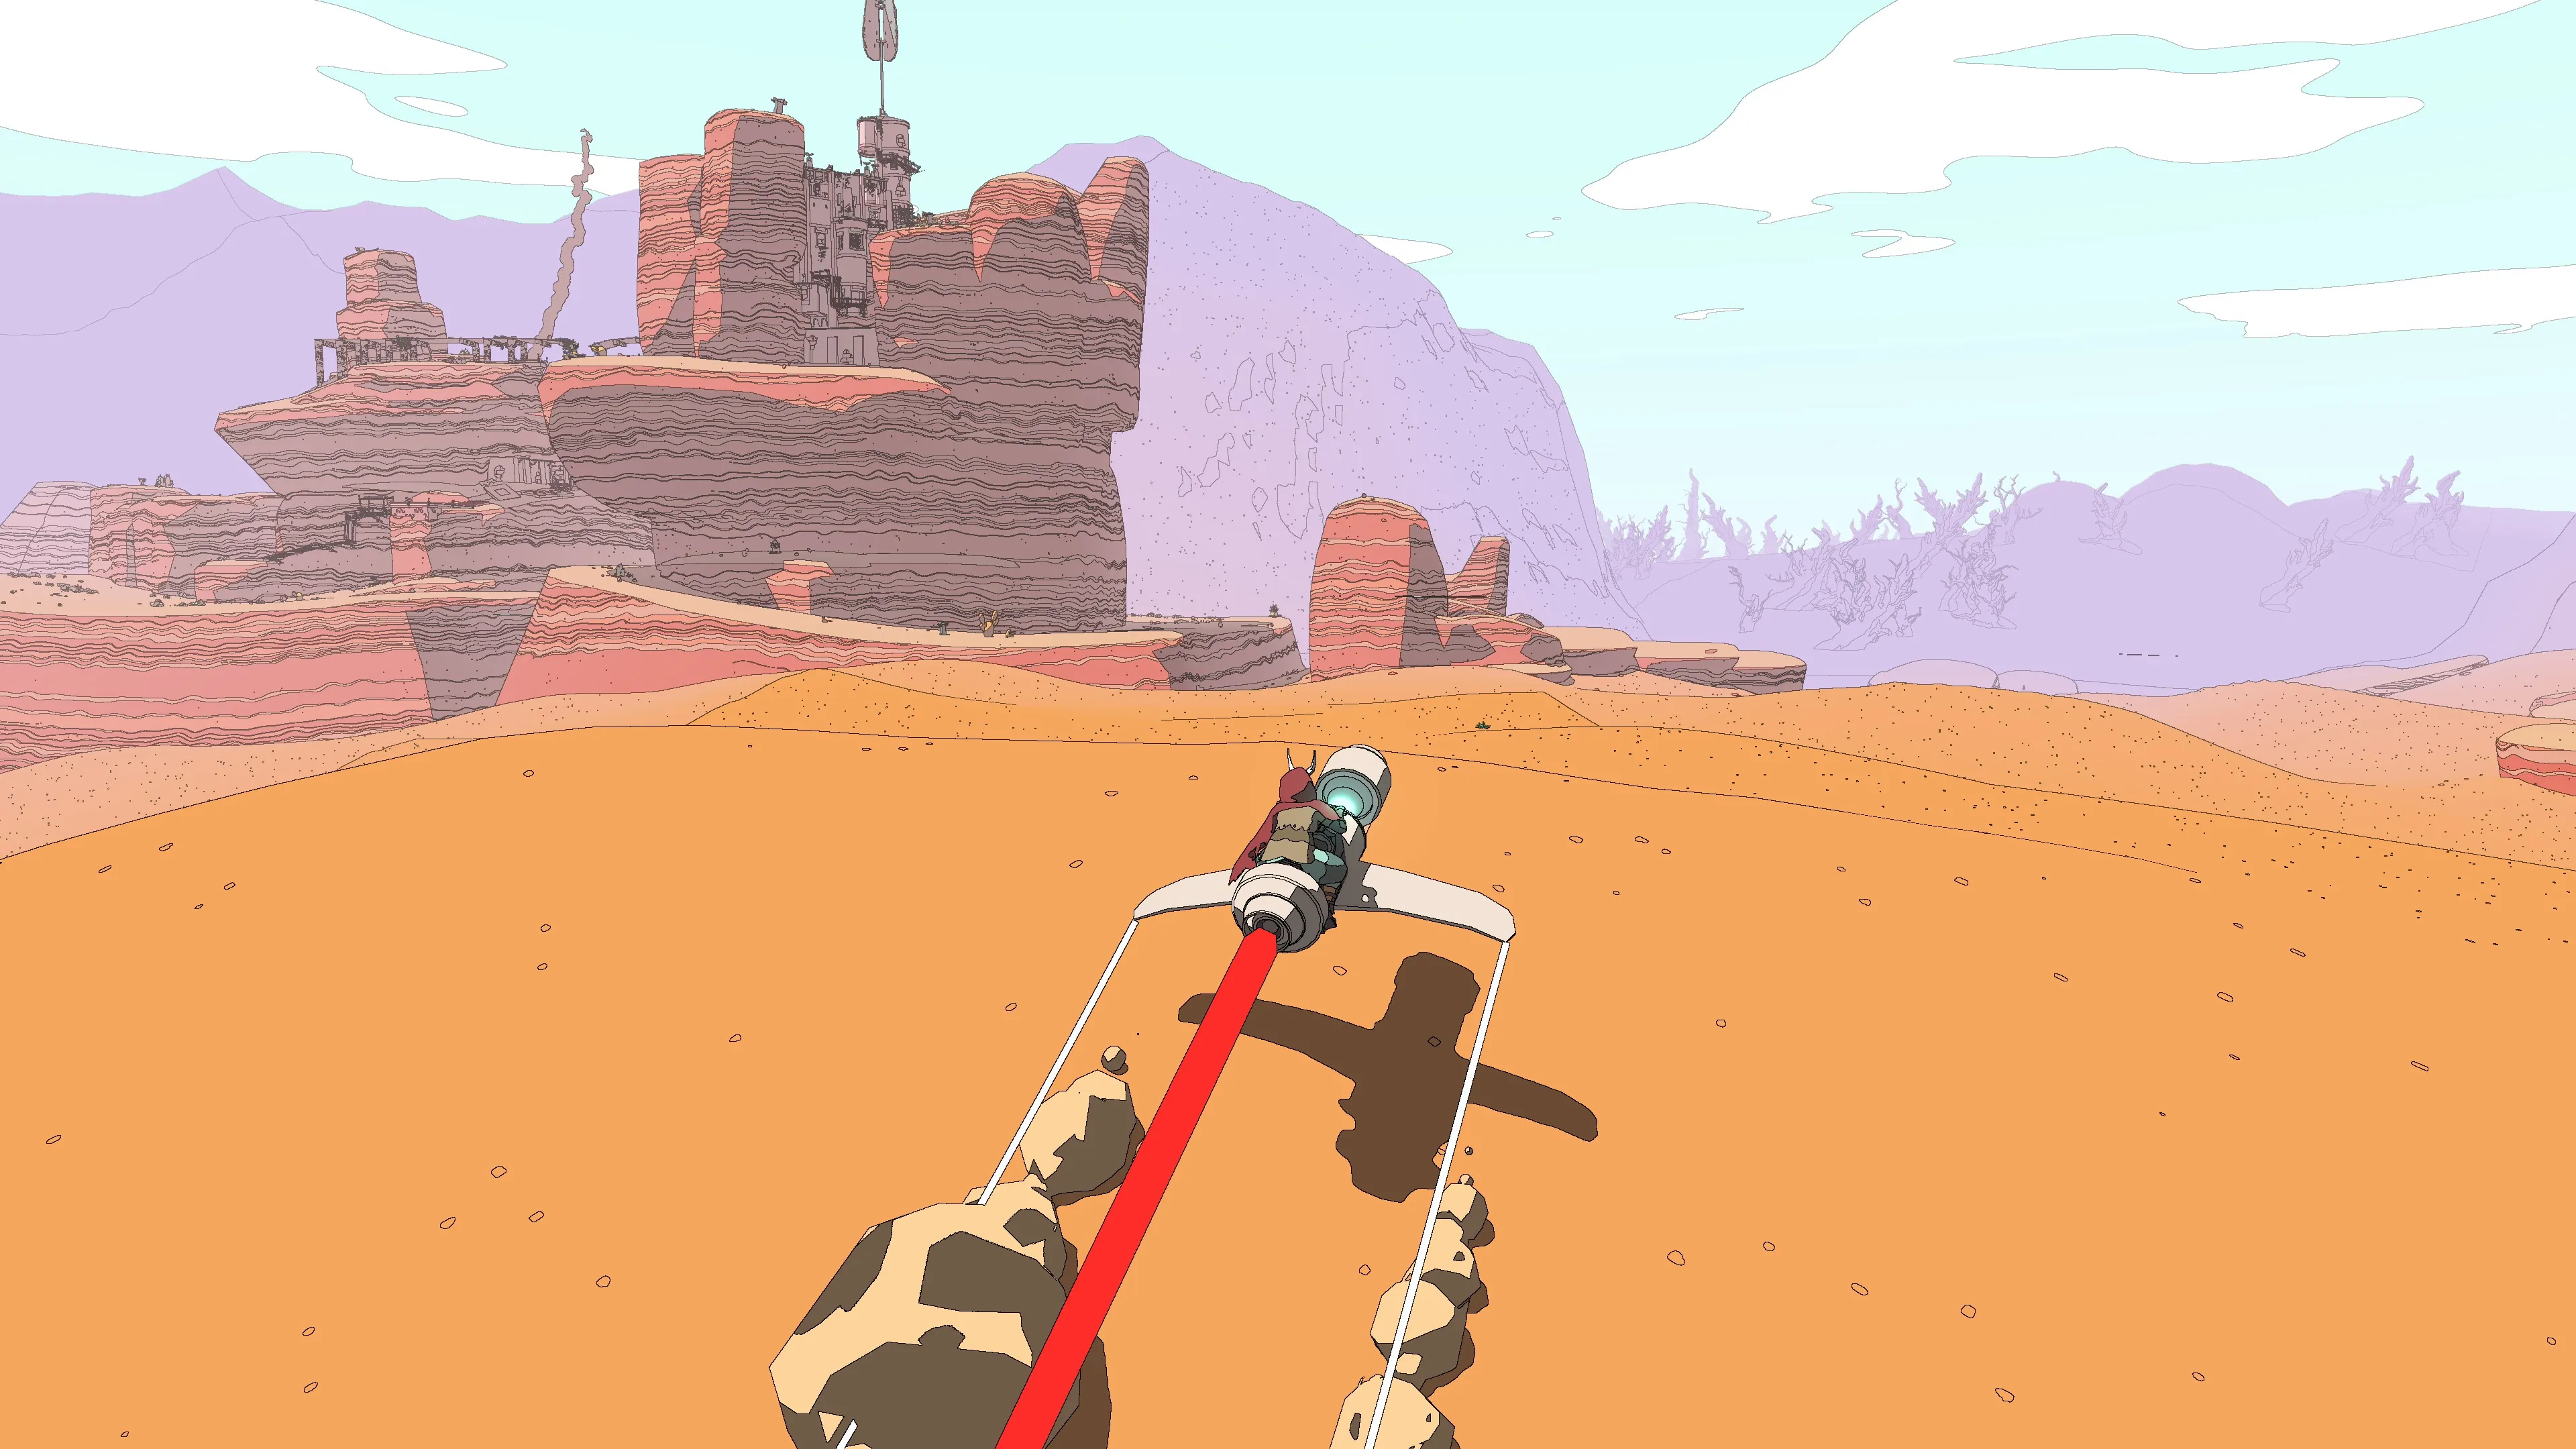
This project started from wanting to understand how that graphic logic actually works, and whether it could transfer to a real-time renderer in Unity URP. The result is on the project page.
Pipeline
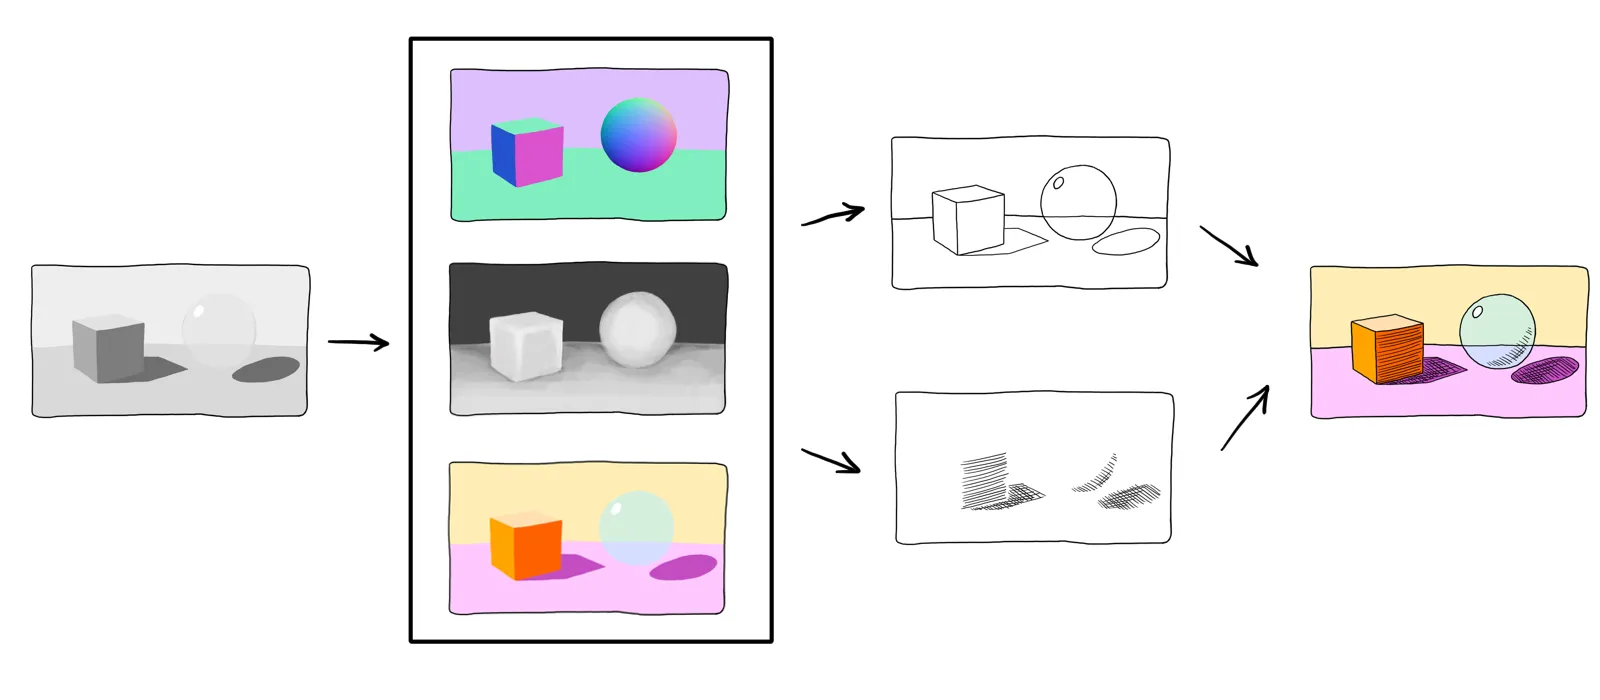
This project uses NPR (Non-Photorealistic Rendering). Instead of simulating physical light, the goal is graphic legibility, with flat colors, controlled shadows, and ink-like outlines. All object shaders are unlit: no light probes, no global illumination. Each one computes its own shading from a single directional light, with lit and shadow colors exposed as inspector properties.
The pipeline has two layers. The first is a set of object shaders (color gradient, bubble, skydome), all unlit. The second is a set of fullscreen post-process passes that run after the scene is rendered: hatching reads the depth and normal buffers to place hatch lines, and the outline pass reads the same buffers plus the color buffer to draw edges on top.
Outline
Outlines are computed as a fullscreen post-process pass. The pass runs after the scene is fully rendered and detects edges by reading the depth, normal, and color buffers. No mesh modification needed: the detector works on pixels, not geometry.
The starting point was a tutorial by Digvijaysinh Gohil covering two detection methods: depth-based and normal-based. Both produced clean results on solid geometry.
Depth-based detection
The depth buffer stores, for each pixel, how far the camera is from the nearest surface. At a silhouette or a hard geometric crease, this value jumps sharply between neighboring pixels. A gradient filter makes those discontinuities visible.
The filter used is the Scharr operator, a 3×3 convolution applied to the depth buffer. Scharr is a variant of the Sobel operator: it uses coefficients 3 and 10 instead of Sobel’s 1 and 2, which produces a more isotropic gradient, responding more uniformly to edges at all orientations.
A pixel becomes an edge if exceeds a threshold.
The code below visualizes this directly as grayscale, brighter means closer. In Unity this buffer already exists, no raymarching is needed.
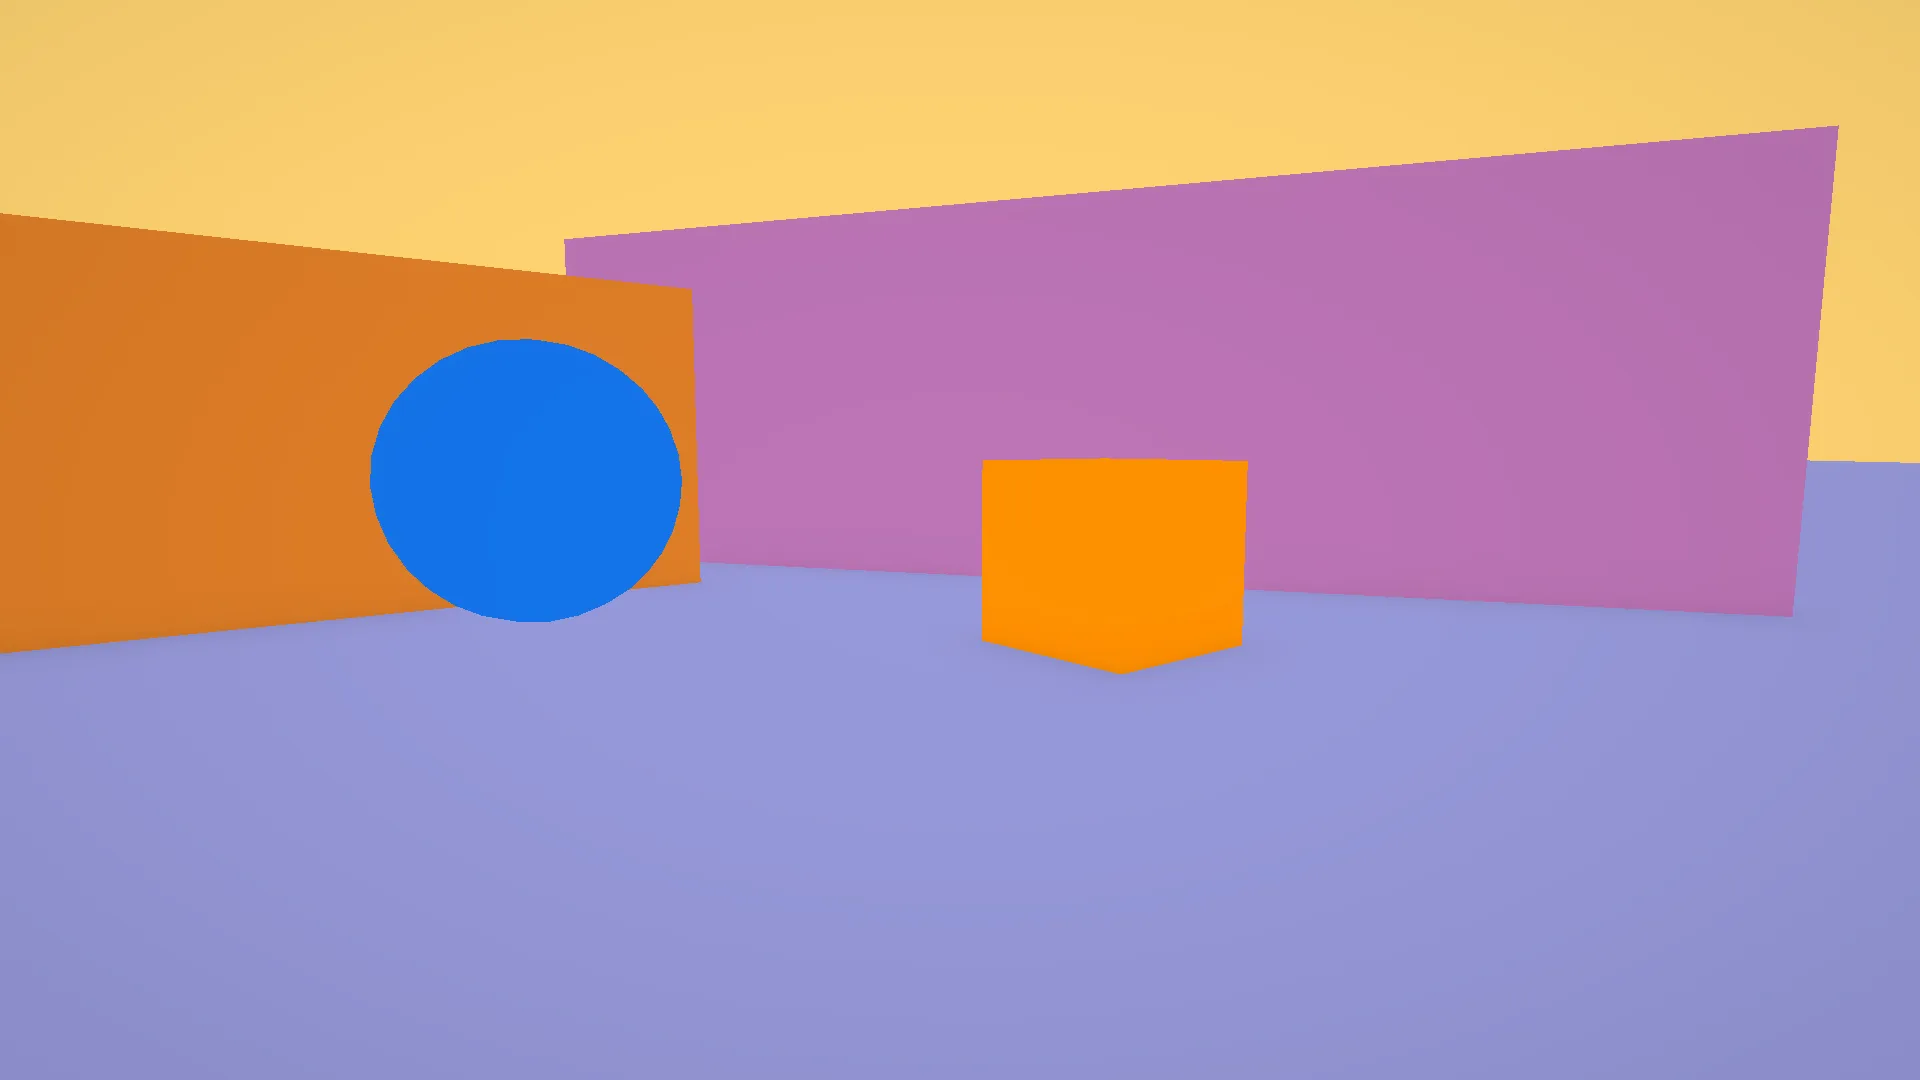
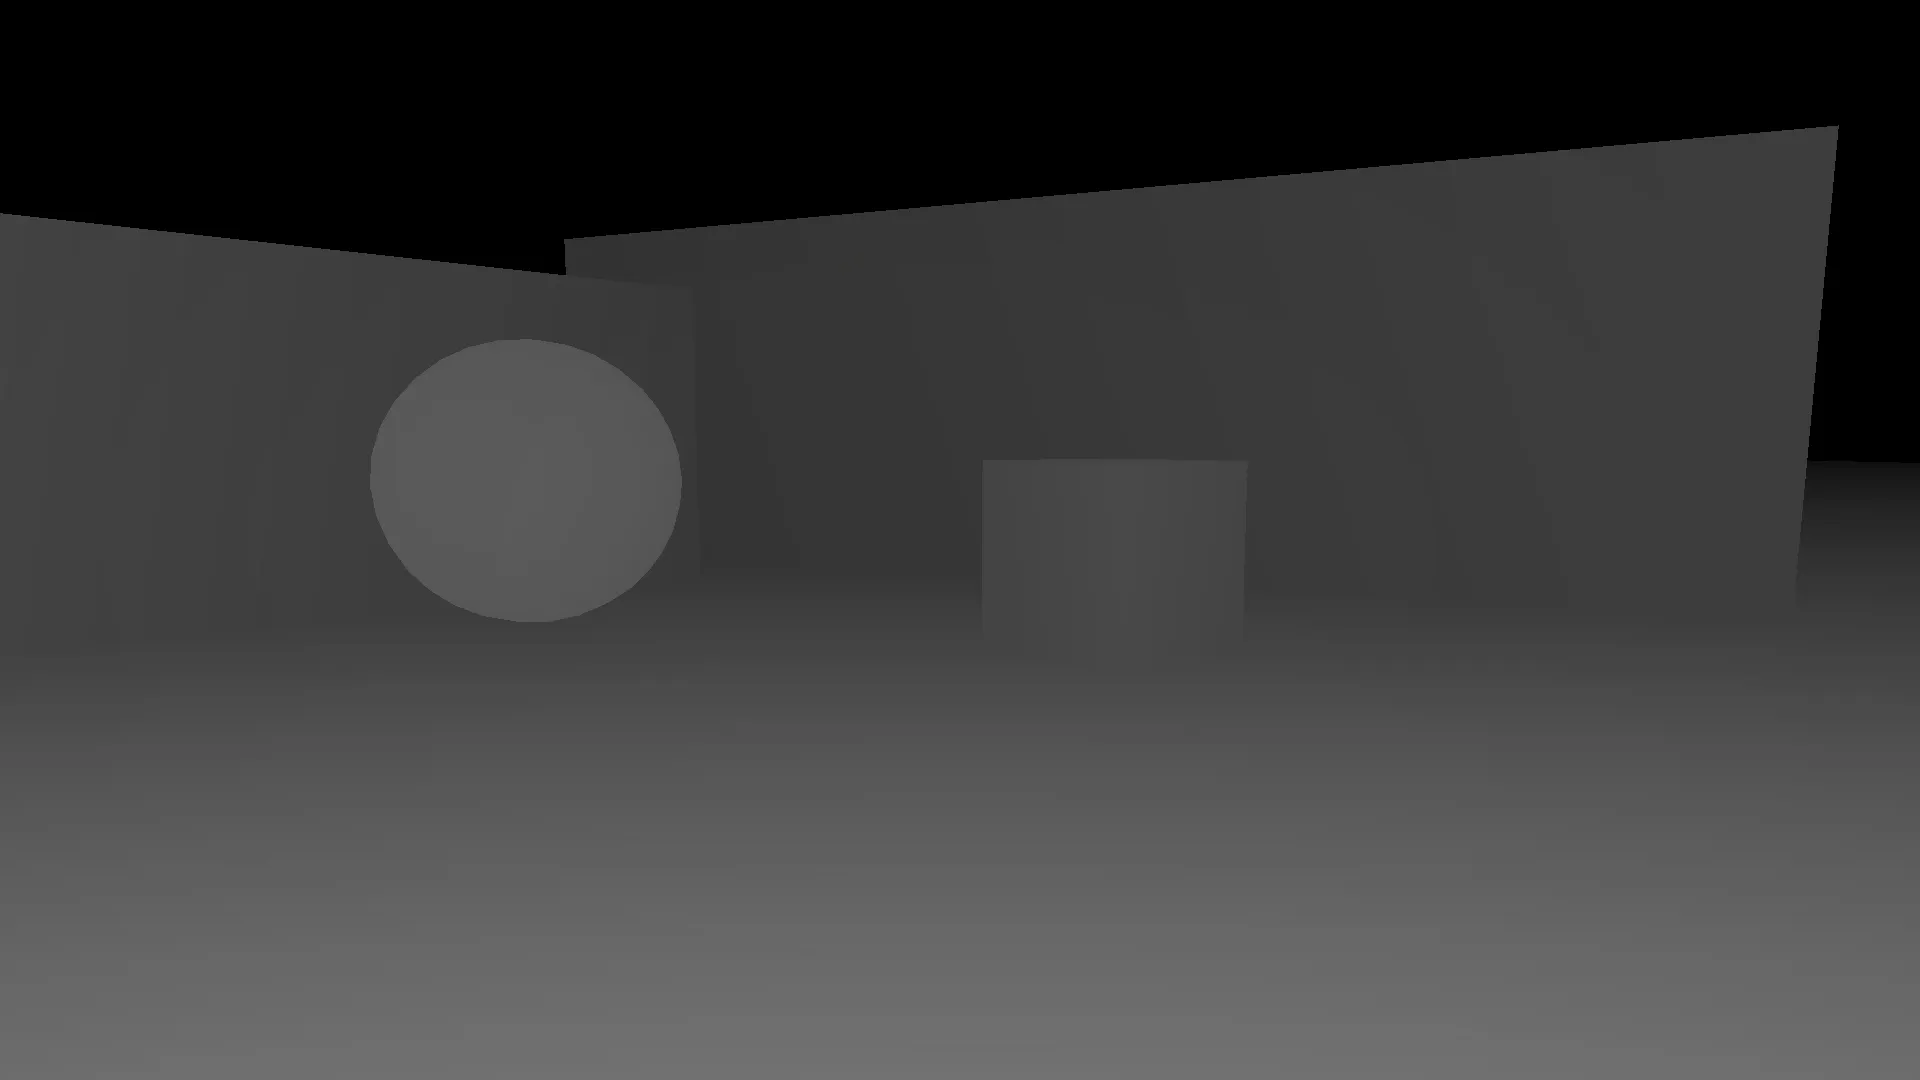
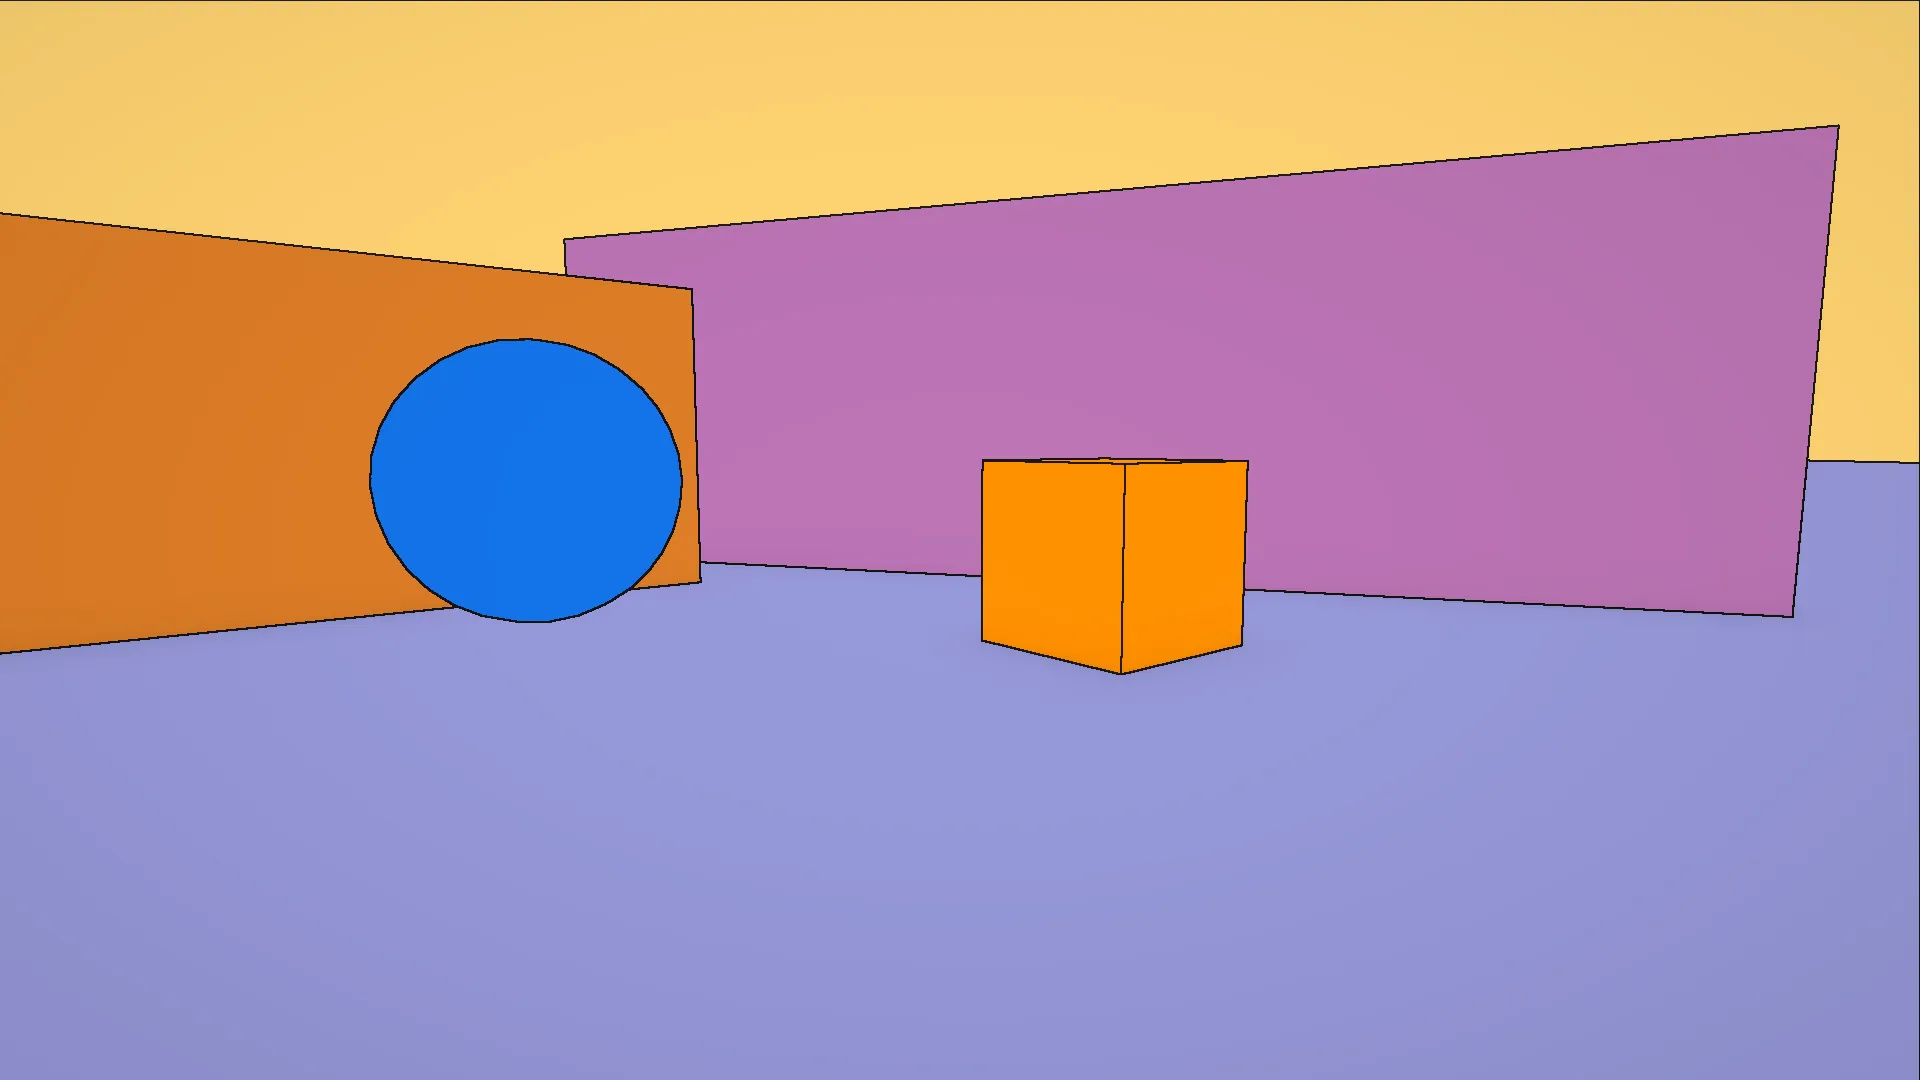
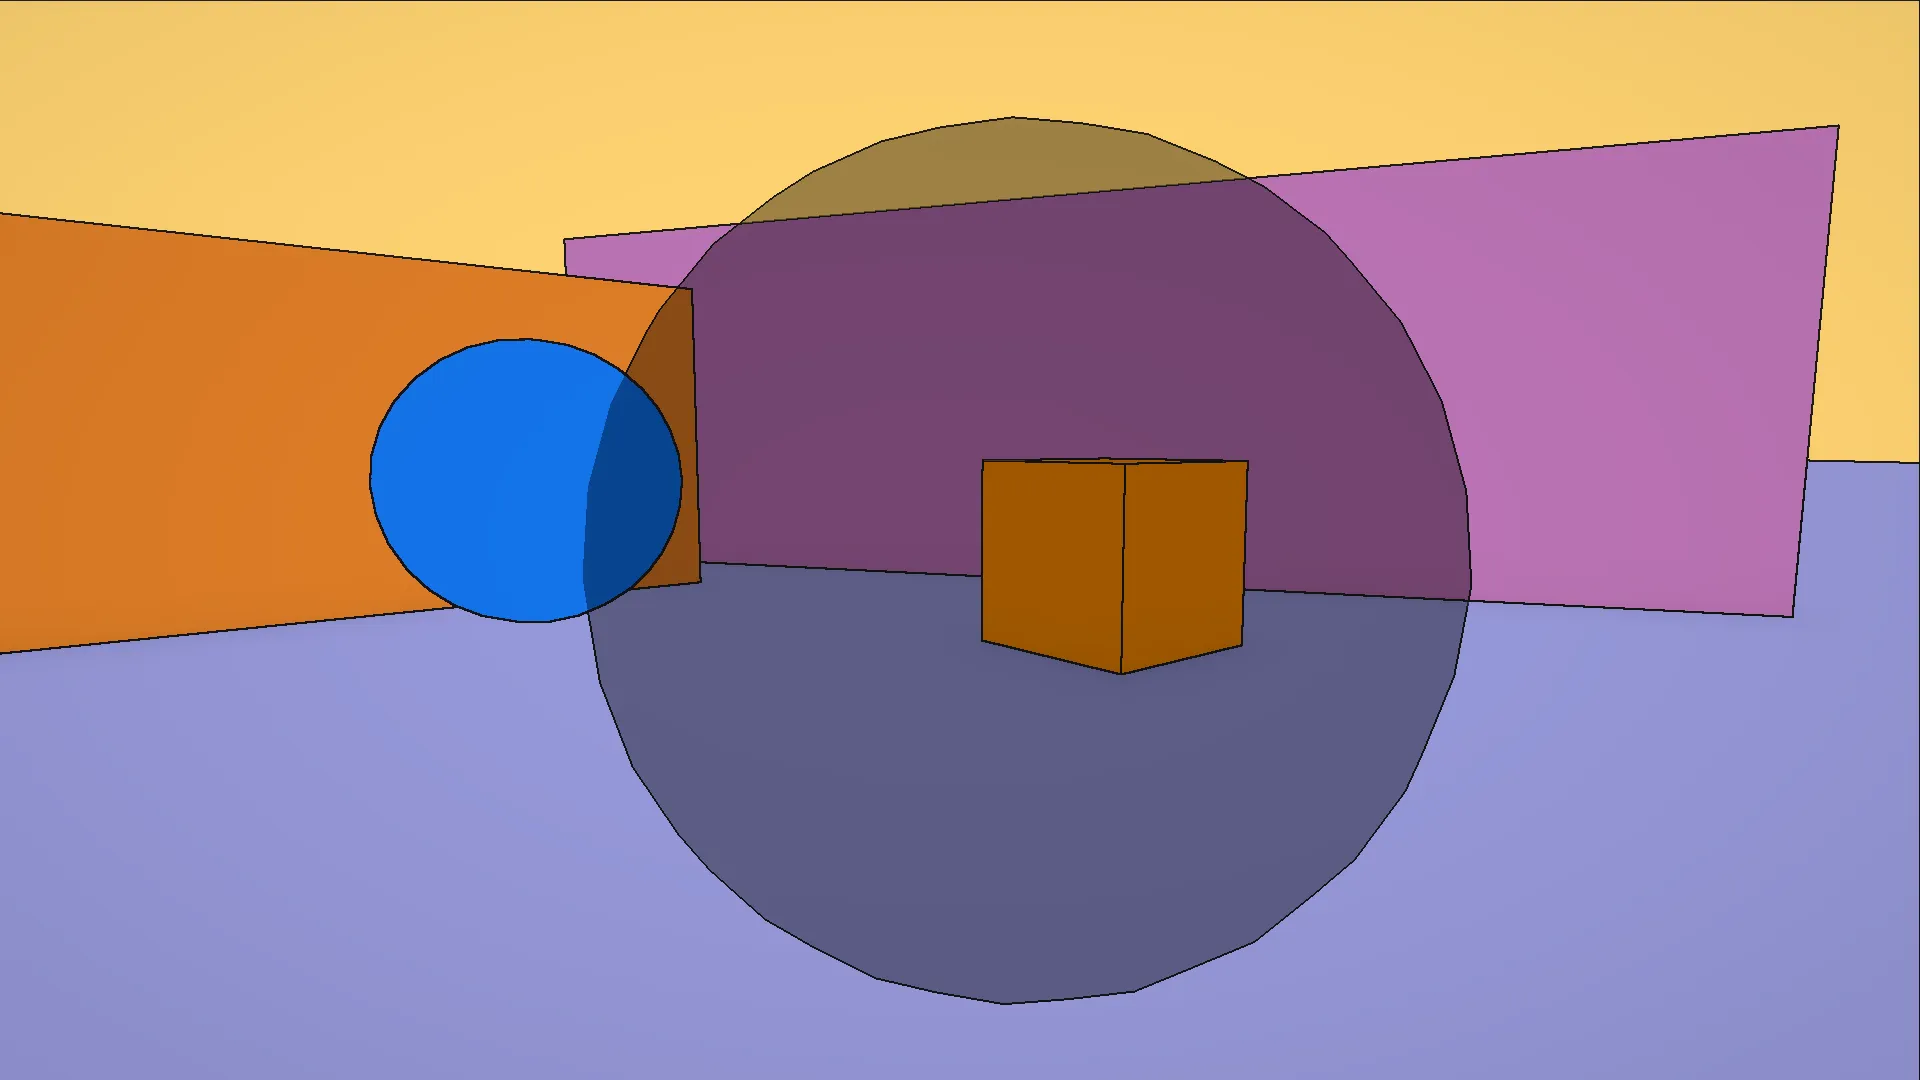
The first image is the test environment built in Unity. All materials are unlit and assigned flat colors chosen only to distinguish the objects from each other: no textures, no lighting, no shading of any kind. The second is the depth buffer as read by the GPU: each pixel stores the distance from the camera to the nearest surface. Closer objects appear brighter, farther ones darker. Flat areas of the same surface blend into a continuous gradient in perspective, while geometry edges produce sharp jumps in value. Those jumps are exactly what the Scharr filter will look for.
Now let’s add some outlines. The following shader applies the Scharr filter to the depth buffer: it samples the 8 neighboring pixels, computes the gradient magnitude from those depth values, and marks a pixel as an edge if that magnitude exceeds a threshold.
Here is the same logic in the actual Unity HLSL. The Scharr kernels are shared across all three detection methods, so they live in a struct:
The result in the Unity scene: the depth-based pass already captures the main silhouettes.
As you can see, we have some problems. The sphere outline is broken and jagged. On a curved surface, depth changes gradually near the silhouette, and the Scharr gradient falls below the threshold at certain angles, producing gaps. Also, the floor is almost entirely black. When the camera looks nearly parallel to a flat surface, that surface has a steep depth gradient in perspective even though it is geometrically flat, so the filter fires everywhere on it and fills it with false outlines.
For now I’m fine with it, since adding normal-based detection on top will fix both.
Normal-based detection
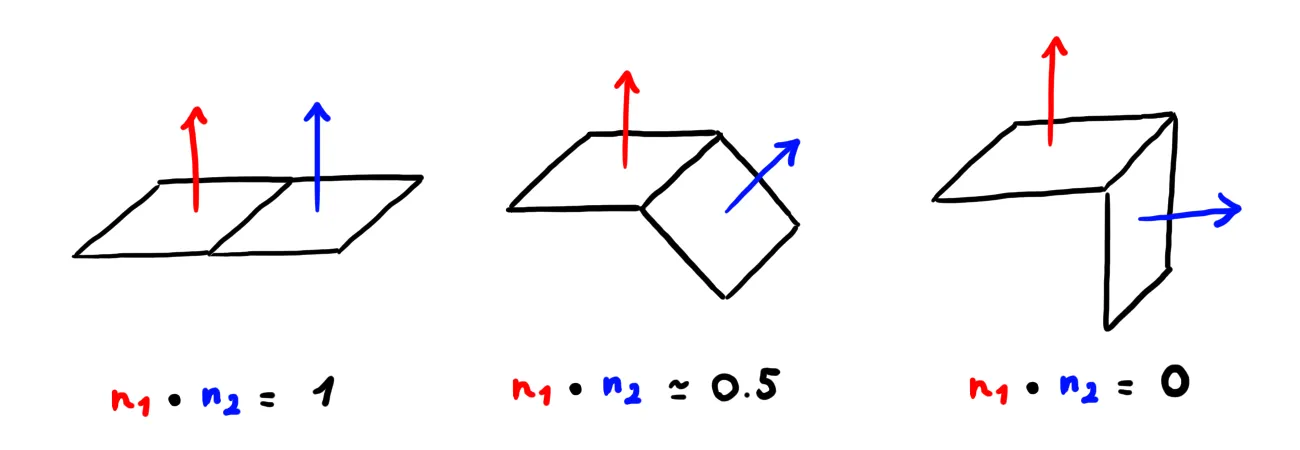
The normal buffer stores, for each pixel, a unit vector pointing perpendicular to the surface. On a flat area, neighboring pixels have nearly identical normals: their dot product is close to 1. At a crease or fold, the normals suddenly diverge, and the dot product drops sharply. Applying the Scharr filter to these dot product values detects exactly those orientation discontinuities.
This catches detail that depth-based detection misses: interior creases, folds, and surface ridges where depth barely changes but the orientation shifts sharply.
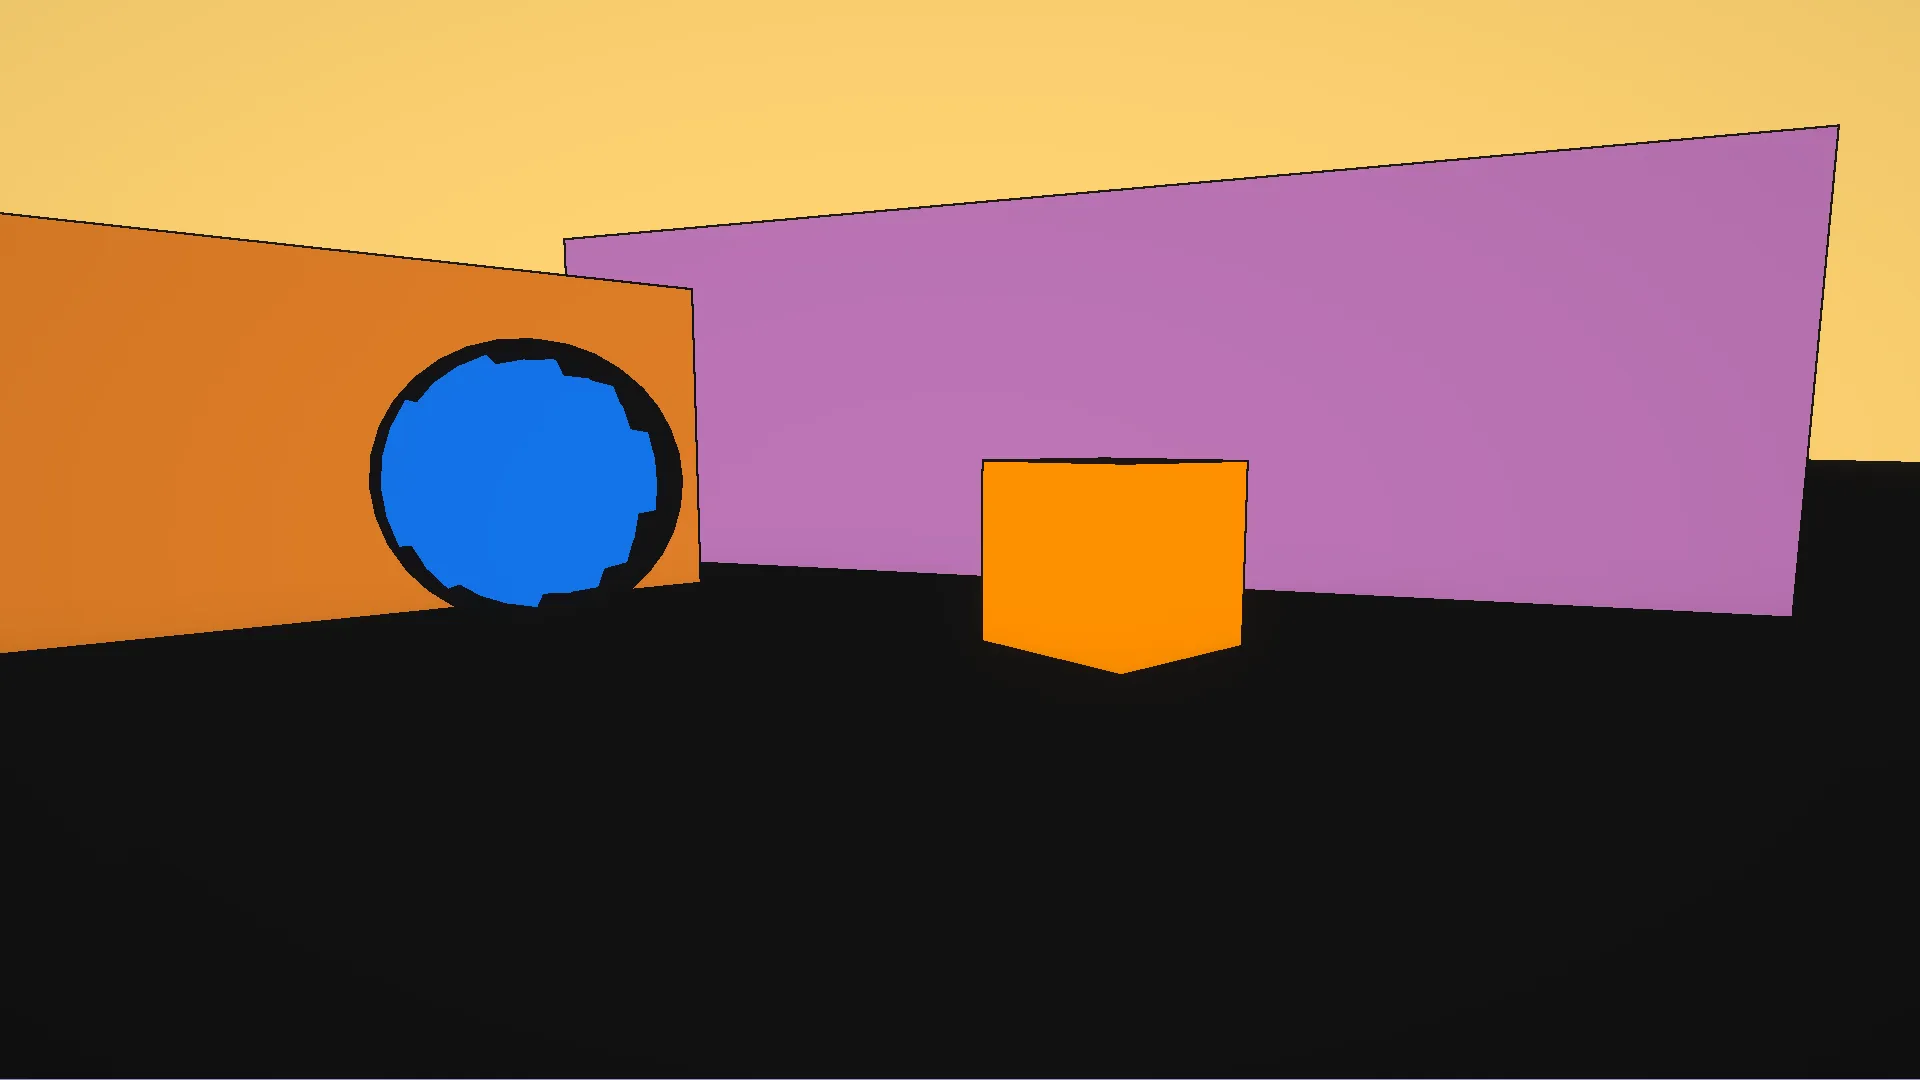
The result is much better. The floor is clean, the sphere has a smooth continuous outline, and the cube shows interior edges that depth alone would have missed.
Both methods work on solid geometry. But what happens when a transparent object is in the scene?

As you can see, transparent geometry doesn’t write to the depth or normal buffers, so both filters see nothing where the object should be. This means that glass, bubbles, or any surface that lets light through will simply never get outlines.
Color-based detection
The fix is to read from the color buffer instead.
Transparent objects do render to color, even if they skip depth and normals.
This third method samples four neighbors (left, right, up, down)
and measures luminance contrast across them.
A smoothstep replaces the hard step, which softens the outline boundary and reduces aliasing.
All three passes combined: the bubble now has a clean outline, and so does everything else.
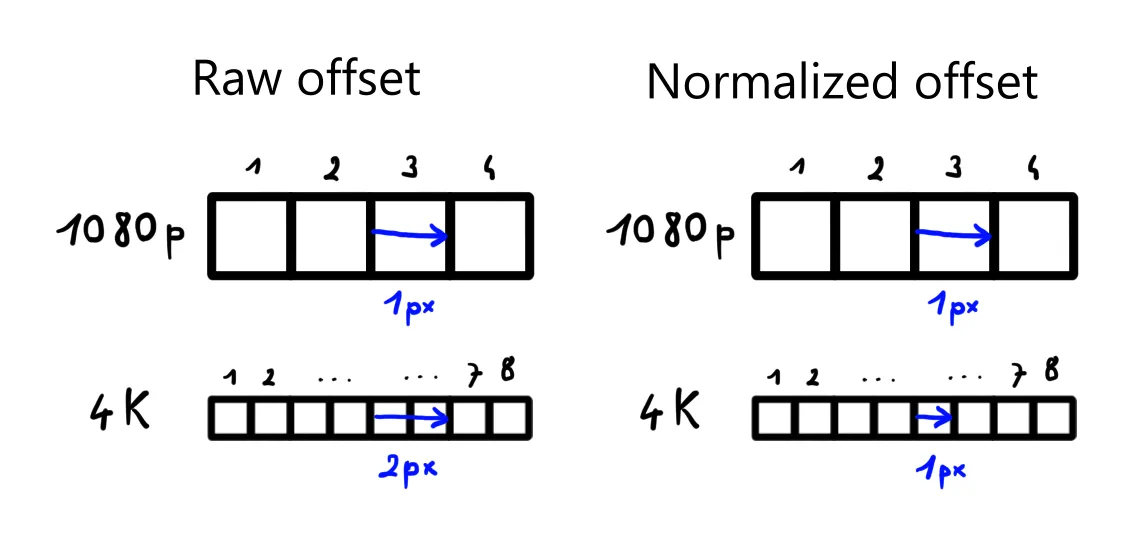
Resolution awareness
The outline pass samples neighbors at a UV offset of OutlinesThickness / screen_resolution.
This matters because UV space is resolution-independent:
the same offset covers twice as many physical pixels at 4K as at 1080p.
Dividing by resolution ensures a thickness of 1.0 always means exactly one pixel on screen,
whatever the rendering resolution.
Limitations
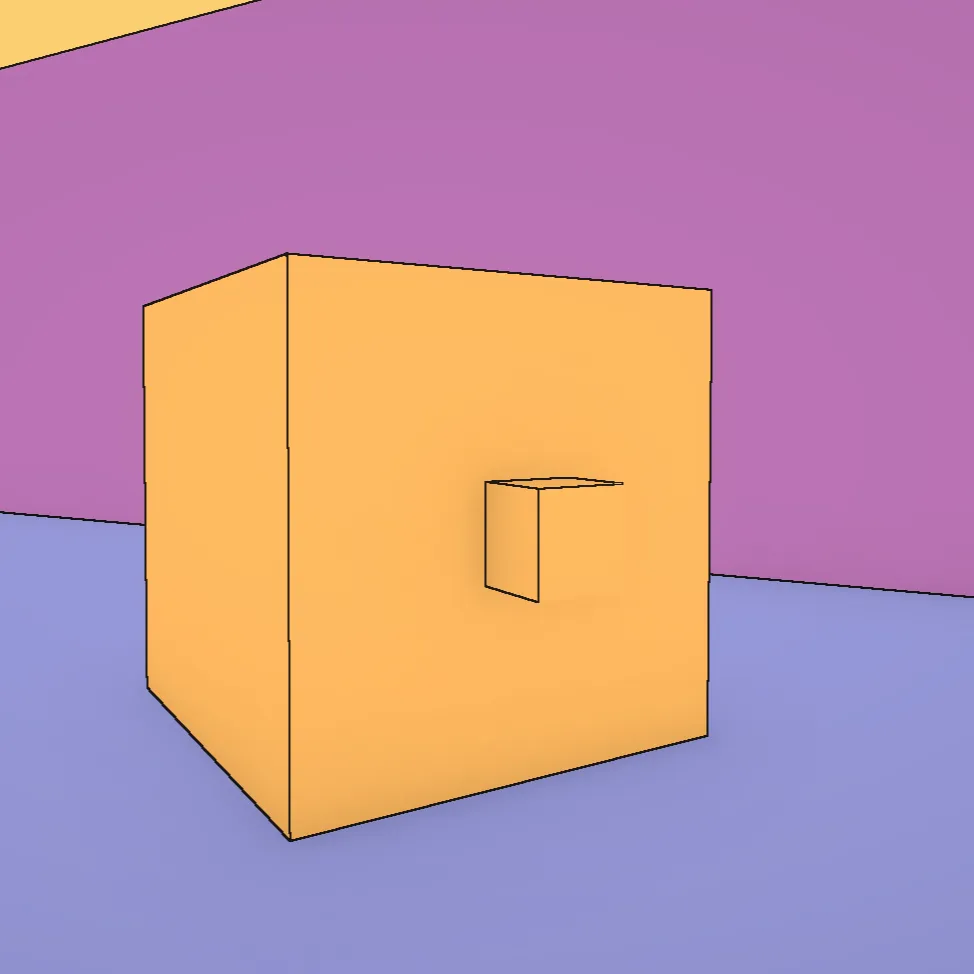
The main limitation is thin geometry. Small objects like brackets or narrow shelves produce incomplete or missing outlines, because the depth discontinuity they create is too small for the filter to catch reliably at a given resolution.
The inverted hull technique would fix this: each mesh is rendered twice, once normally, then scaled up slightly with backfaces visible, producing a solid outline that doesn’t depend on depth differences in screen space. It handles thin geometry cleanly regardless of size or distance. The tradeoff is that it only produces outer silhouettes, so interior creases and surface details would still need the screen-space pass on top of it. A hybrid approach (hull for silhouettes, screen-space for interior detail) could combine the best of both. Maybe a project for later?
Color gradient
The color gradient shader is the base layer all scene objects build on. Each object computes its own shading from a single directional light, with no light probes or global illumination. The shader maps that lighting to two colors: one for lit surfaces, one for shadow, with a controllable gradient between them.
Light mask
The starting point is the Lambert diffuse term, one of the oldest models in rendering. It states that the intensity of light on a surface is proportional to the cosine of the angle between the surface normal and the light direction, which in code is a simple dot product. A surface facing directly toward the light returns 1; edge-on returns 0; facing away goes negative, clamped to 0 since those faces receive no light.
In a physically-based renderer, this smooth gradient is the goal. But this is not what we want. To imitate Moebius’s coloring we aim for flat areas of color with a clean boundary between light and shadow, not a photographic fade.
The simplest fix is a step function: below a threshold the surface is in shadow, above it is lit.
This is the foundation of cel shading. The output is binary: 0 or 1, no in-between.
The mask drives a lerp between a shadow tint and a light tint, both multiplied against a shared base color. The captures from here on already show those tints applied.
Already looks nice, and with outlines on top it could pass for a comic-book renderer. But I wanted more control than that (the shader is called Color Gradient for a reason). I wanted the option to keep a soft gradient when the material called for it, to move the shadow line wherever it needed to sit, and to control exactly how sharp or soft the transition should be.
Subtracting the threshold before clamping moves the boundary anywhere on the surface. Multiplying by a scale factor controls how fast the transition happens. A high scale compresses the ramp into a near-hard edge; a low scale spreads it into a soft gradient.
Both spheres below use the same threshold and colors but different scale values: the top one is soft, the bottom one approaches the hard cel-shading step.
The last step multiplies the mask by the shadow attenuation from Unity’s shadow maps. A small custom HLSL function reads it from the main directional light:
With this factor in, a surface in the cast shadow of another object has its mask pushed toward 0
regardless of its NdotL.
The function also includes a preview stub that returns 1.0,
since TransformWorldToShadowCoord is unavailable outside a real render pass.

Now each face responds to the light direction with its own tint, cast shadows land on the ground and on neighboring surfaces, and the outline pass runs on top of everything.
The outline pass and the color gradient shader together establish the visual language of the scene. Hatching, bubble, and skydome are covered in part 2.
Sources
- Digvijaysinh Gohil. Outline Shader in Unity URP. youtube.com
- Lake, A., Marshall, C., Harris, M., Blackstein, M. (2000). Stylized Rendering Techniques for Scalable Real-Time 3D Animation. dl.acm.org
- Akenine-Möller, T., Haines, E., Hoffman, N. (2008). Real-Time Rendering, Third Edition. A K Peters.
- Wikipedia. Sobel operator. en.wikipedia.org